Mostrando entradas con la etiqueta Do-it-yourself. Mostrar todas las entradas

viernes, 24 de noviembre de 2017

"Dice tray" casero.

La caja, nuestro "dice tray" una vez terminada.
Aprovechando los restos de un caja nido de las que se venden en las tiendas de animales, me dediqué el fin de semana pasado a hacer lo que los americanos llaman "Dice tray", una caja generalmente en forma cuadrada, rectangular o hexagonal para poder lanzar los dados sin que se nos vayan a la cocina del impulso. Estuve tentado también de montar una "Tower dice", una torre para lanzar los dados y que ocupan un espacio limitado, pero no me veía utilizándolo de una manera prolongada, aunque hay verdaderas obras de arte en Internet que se ha hecho la gente de una manera más o menos artesanal, incluso con piezas de Lego.

El montaje no tiene ningún secreto, una base y cuatro paredes encoladas o pegadas y un fieltro adhesivo verde en el fondo y en los laterales. En principio el montaje se iba a realizar con clavos, pero las paredes de los laterales no eran excesivamente anchas, 6 mm, por lo que opté por pegarlas con pegamento para madera.


La madera inicial.


Sargentos para sujetar bien las piezas con pegamento.


La caja ya montada, de unos 5 cm de alto


Barnizado con este barniz-tinte efecto palisandro.


La caja ya barnizada por sus caras exteriores.


Los perfiles de acabado iniciales, demasiado grandes.


El papel adhesivo de imitación terciopelo de color verde.


Finalmente el acabado con unas tiras de 2 mm, barnizadas con barniz Vallejo.


Aprovechamos el mismo papel adhesivo para unos topes.


El conjunto ya acabado.

domingo, 28 de febrero de 2016

Unpainted Risk figures for wargaming. Final solution?

The initial intention to play with the rules of Pas de Manoeuvre! was to reproduce the units with Risk figures, since I saw a website with this option.


I started painting a few figures (some Austrian units and French chasseurs à cheval) and the final result was not bad, but the problem is that I have 3.000 figures! to paint, and I do not intend to spend the next 2 years painting figures at 1:144 (more or less) scale!.


Then in the BGG I found a member, Jim O'Neill, who had used the Risk figures to play the game Maurice, but painting the bases and figures only with two or three colors:


Jim O'Neill's good final scene.

Due to lack of time ... and attitude to paint all that amount of small figures, I saw that Mr. O'Neill option was the most likely, if I wanted my wargame proposal not to dilate in time. So I classified all the figures by their color:


 and started to basing the figures with with a sort of papier mache for kids craftwork:


There are basically 3 sizes for bases: 35x20 mm for infantry, cavalry,  wagons and C-in-C, 20x20 mm for commanders and 25x25 mm for artillery. The thickness of bases is about 3 mm.


I show you some examples with yellow, red and blue figures: bases with 8 standing figures are Guards or elite units, bases with 8 kneeling figures are line infantry units, while bases with 4 kneeling figures are light infantry or skirmishers


For cavalry, bases with three horses are light cavalry and units with four horses, heavy cavalry. I'm testing also with lancers, with three horses per bases. The artillery have 2 cannon figures per base representing a battery of 8-6 real cannons.


Commanders, wagons and some lancers.


The final part was varnishing the bases with varnish for children craftwork, because we didn't need a varnish of high quality for dozens and dozens of papier mache bases.


I think the advantages of this method are more numerous than the disadvantages:

- Considering the bicolor blocks of kriegspiel are represented, it is the most similar method with figures.

- The figures are more easily distinguished at distance.

- We can mix various colors according to uniform figures (approximately, of course) on one army. (Ex: The green uniforms of the 95th Rifles with the British red uniforms of line units).

- Fast gluing and varnishing of bases. Without painting the figures, in a week and a half we have almost three armies equivalent to 50,000 troops each one (depending on the scale).


The biggest disadvantage is obviously that uniforms in many cases (helmets and shakos) do not correspond and uniforms are not painted in real detail, but as we refocused the game as a sort of kriegspiel wargame, in the end it wasn't a bad result. Besides also the old cliche of spending more time painting figures than playing, and whenever I see people producing great battles, for many figures they have, always ends the situation painting and repainting more figures!


domingo, 21 de febrero de 2016

Tableboard for Pas de Manoeuvre wargames...one more step beyond!

As "One step beyond" lyrics from "Madness" pop group said, I decided to go a step further and transform my tableboard (http://pdeman.blogspot.com.es/search/label/Do-it-yourself) for my Pas de la manoeuvre! rules and turn it into a sort of "kriegspiel" table with wooden MDF squares of 10x10x0,12cm (4"x4"x0,05") of different heights, adding the terrain elevation factor.


To keep each square into position and avoid "dancing pieces" in motion by some random stroke I bought a bag of plastic crosspieces of 1mm wide attached to the board with Ceys glue.

Plastic crosspiece for ceramic floors and walls.

The final result: squares of 10cm (4") , and the previous version of 6cm (2,36") black squares.

To gain time (as Napoleon style) with the work of placement and marking of wooden blocks, I made a cardboard template, marking the center and half of each side, with a permanent blue pen.


To simulate the contours of the terrain, I bought MDF wooden boards of 0,03cm (0,01"), which kept giving different ways.


Cutting the pieces.

domingo, 13 de septiembre de 2015

Tableboard for Pas de Manoeuvre wargames

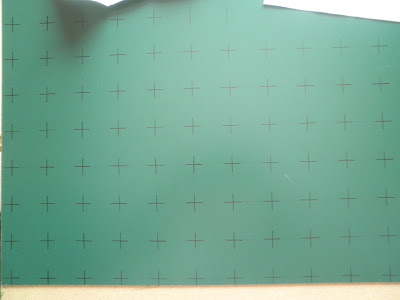
With the remains of a box for a shower plate that someone left on the street near my home, I made a support for a dark green slate board, 120 cm x 70 cm (47,24 in x 27,56 in), to draw a square grid of 6x6 cm (2,36 in x 2,36 in). The previus design with MSExcel was for a square grid of 8x8 cm (3,14in x 3,14 in).


The wooden shower box plate.

A side view of the rudimentary box

The dark green slate is glued with wood glue to the surface of the box. Various books of some loss-house encyclopedia transform their cultural destination in constructive destination. 

Crosses of 2 cm (0,78 in).


The final size dimensions are 21 x 12 square grid, for a scale of 200 meters/square, a total of 4,2 km x 2,4 km, a relatively comfortable scale for a small Napoleonic battle.


At the end, painting the sides with green colour and varnished wood molding finishing the board. The next and final logical problem is the storage. I bought 4 small rubber wheels, to keep the board "on foot" and be able to move the surface from one place to another.


Big failure!. The weight of the molding table and the little surface base surface makes the joint totally unstable, so you have to add a little weight in the base so that the table does not tilt dangerously.